Gojo's Kikufuku (Zunda & Cream stuffed Mochi): Inspired by Jujutsu Kaisen (gluten free)

Share This Recipe

This post may contain affiliate links. Please read my privacy policy for details. As an Amazon Associate I earn from qualifying purchases.

Inspired by Jujutsu Kaisen, I’m making Gojo Sensei’s Kikufuku! This scene is both beautiful and ridiculous. Right before the big fight, Gojo starts talking about the special mochi that he picked up on his trip. These mochi are stuffed with a delicious whipped cream and Zunda, a sweetened edamame paste. Fresh mochi is truly a special treat that I highly recommend trying some day. The dough is soft and chewy, the zunda has a sweet and earthy flavour, and the whipped cream came out perfectly! I used a bit of the vanilla bean paste that I brought back from Japan and it was a real game changer (so if you can get your hands on some, it’s totally worth it!). This Kikufuku transported me back to walking around Nara, Japan, freshly pounded mochi in hand. So I’d call this a win!


I have to be honest with you all, making mochi for the first time was not easy… in fact, I messed up so many times and I think I just made the process as hard for myself as possible. Making the mochi wrappers too small (multiple times), making the fillings too big (multiple times), etc… Lesson learned, don’t make a two-filling stuffed mochi for your first attempt. I’m really proud of how they came out, but wow, that was definitely a learning experience, and I’ve still got a ways to go before I feel confident in my mochi skills! But I am so excited to keep trying!

If you make this recipe, I would absolutely love to hear your feedback and would love to talk to you all some more so please leave a comment! Also, if you do make this recipe, I’d really love to see your creations so please tag me on Instagram.

If you have any requests for inspired/themed recipes that you’d like to see, please let me know!

Sign up for our free newsletter that will be delivered straight to your inbox and stay in touch with me on Instagram, Facebook, and Twitter for all of the latest goodies.

My Essential Pantry Items

Mochiko Glutinous Rice Flour

Vanilla Bean Paste

Oxo Good Grips Cookie Scoop, Medium

Gojo's Kikufuku (Zunda & Cream stuffed Mochi): Inspired by Jujutsu Kaisen

Inspired by Jujutsu Kaisen, I’m making Gojo Sensei’s Kikufuku! These mochi are stuffed with a delicious whipped cream and Zunda, a sweetened edamame paste. Fresh mochi is truly a special treat that I highly recommend trying some day. The dough is soft and chewy, the zunda has a sweet and earthy flavour, and the whipped cream came out perfectly! I used a bit of the vanilla bean paste that I brought back from Japan and it was a real game changer (so if you can get your hands on some, it’s totally worth it!).
Course Dessert, Snack
Cuisine Japanese
Servings 8

Ingredients
  

For the Zunda (Edamame Paste):

  • 300 g peeled edamame beans (fresh or frozen)
  • 30 g granulated sugar
  • ¼ tsp salt
  • 3-4 Tbsp water adjust for desired texture

For the Vanilla Bean Whipped Cream:

  • 1 cup whipping cream
  • 1 tsp cornstarch
  • 1 Tbsp powdered sugar
  • ¼ tsp vanilla paste (can be substituted with vanilla extract, but the paste is so good!)

For the Mochi Dough:

  • 1 cup mochiko glutinous rice flour (158g)
  • ¼ cup granulated sugar
  • 1 cup water
  • potato starch Lots of it to prevent sticking!

Instructions
 

For the Zunda (Edamame Paste)

  • Defrost beans and pulse in a food processor until desired texture. You can add a few Tbsp of water here to help you get the desired texture. (I prefer it smooth)
  • In a small pot over medium-low heat, add bean paste, half of the sugar and 1 Tbsp water. Mix until sugar is dissolved. Add the rest of the sugar, salt, mix until dissolved, and your zunda is ready!
  • Place zunda in the fridge overnight to firm up, or spread thin and put in the freezer until firm.
  • Note: The edamame paste can be stored in an airtight container in the refrigerator for about 3-4 days, or in the freezer for longer. Defrost in the refrigerator overnight.

For the Vanilla Bean Whipped Cream:

  • Begin whipping your cream until you reach soft peaks. Add in the corn starch, sugar and vanilla paste.
  • Continue whipping your cream until you have firm peaks but they are not crumbly. Be careful not to over whip the cream or you’ll end up with butter!
  • Transfer the whipped cream to a container and place in the freezer until hardened.

To assemble the filling:

  • Divide the zunda into 8 evenly sized pieces and roll into a ball.
  • Between 2 medium pieces of plastic wrap, roll the zunda out to a disk.
  • Working one at a time to prevent melting, use a 1 ½ Tbsp cookie scoop (or 2 spoons) scoop out a ball of whipped cream, place it in the middle of the zunda disk, and use the plastic wrap to help wrap the paste around the whipped cream. Twist closed and place back in the freezer.

For the Mochi Dough:

  • In a medium-large microwave-safe bowl, whisk together the mochiko, sugar, and water. Whisk until the mixture is smooth and there are no more clumps remaining. Clean the sides of the bowl by scraping down any residual batter.
  • Cover with plastic wrap and microwave for 1 minute.
  • Using a wet spatula, mix the mixture well. Recover with plastic wrap and microwave for another 1 minute. You will repeat this a third time for an additional 1 minute. Only repeat afterwards (in 30 second increments) if the dough isn't yet ready. It should be thoroughly sticky and translucent. Different microwaves have different power levels so adjust accordingly.
  • Generously cover your work surface (either a sheet pan or large cutting board that will fit in the fridge) with potato starch.
  • Pour out the hot mochi onto the potato starch, coat the mochi dough and your rolling pin with more potato starch and roll out into a thin rectangle.
  • Let cool and set in the fridge for 15 - 30 minutes.
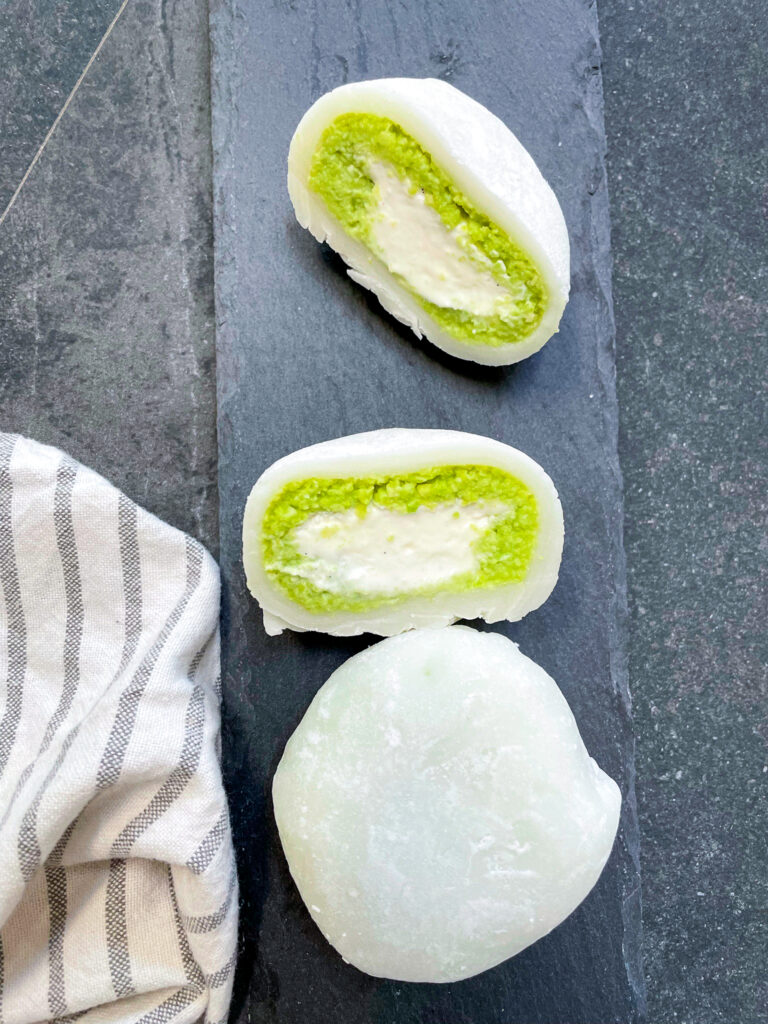
  • Remove the mochi from the fridge and cut into 8 pieces (These mochi will be chubby!)
  • Working one at a time to prevent melting, remove one of your frozen filling balls from the freezer and unwrap.
  • Use a pastry brush to remove the excess potato starch from your dough. Place the filling ball in the centre of your mochi wrapper. Fold the sides up and pinch shut. To help you get the proper shape and make sure everything is well sealed, wrap your mochi in plastic wrap and twist closed. Place in the freezer, and repeat with your remaining mochi.
  • After waiting at least a few hours for the mochi to set, you can defrost your mochi at room temperature (it will take a few hours) before enjoying.
  • Note: Don't store your mochi in the fridge, it ruins the texture. Storing your mochi in the freezer and then defrosting as desired, maintains the freshness of the mochi!
Keyword Anime, Dessert

Gluten Free With Me is where food and geek meet! 

With a heavy focus on food inspired by Japan and recreations from your favourite Anime, Manga, Movies, & Games. 

Oh… and It’s all gluten free!

You might also enjoy

DID YOU MAKE THIS RECIPE?

Please share the pictures with us!
Tag @Glutenfree.Carly #Glutenfreewithme and #geekwithme on Instagram

Leave a Reply

Your email address will not be published. Required fields are marked *

Recipe Rating


Subscribe to our Newsletter and Stay up to date!