Karasuno Roll Cake: Inspired by Haikyu!! (gluten free)

Share This Recipe

This post may contain affiliate links. Please read my privacy policy for details. As an Amazon Associate I earn from qualifying purchases.

Inspired by Haikyu!! I’m making a Karasuno roll cake! This show is so amazing and I love it so much, I wanted to make a fun treat to capture the “Fly High” spirit of some of the best anime boys! I made a light and fluffy vanilla cake with a chocolate whipped cream filling, made black by using activated charcoal. Gotta get those Karasuno colors!  

The recipe for this delicious cake was based on a recipe from the incredibly talented Yukiko Nakajima of Comeconoco Gluten Free Laboratory & Cafe in Osaka. The cake was really fun to design/decorate, it was easy to make, and was really tasty. I put Hinata Shoyo getting ready for a perfect spike on it, the Karasuno “Fly High”, and their iconic crows on this cake. Taking the extra time to pipe out the design was honestly not that hard, and made for a really unique and fun cake. Totally happy with how it came out! 

If you make this recipe, I would absolutely love to hear your feedback and would love to talk to you all some more so please leave a comment! Also, if you do make this recipe, I’d really love to see your creations so please tag me on Instagram.

If you have any requests for inspired/themed recipes that you’d like to see, please let me know!

Sign up for our free newsletter that will be delivered straight to your inbox and stay in touch with me on Instagram, Facebook, and Twitter for all of the latest goodies.

My Essential Pantry Items

Cake Decorating Supplies Kit

Vanilla Bean Paste

Coconut Activated Charcoal Powder

Karasuno Roll Cake: Inspired by Haikyu!!

Inspired by Haikyu!! I'm making a Karasuno roll cake! This show is so amazing and I love it so much, I wanted to make a fun treat to capture the “Fly High'' spirit of some of the best anime boys! I made a light and fluffy vanilla cake with a chocolate whipped cream filling, made black by using activated charcoal. Gotta get those Karasuno colors! The cake was really fun to design/decorate, it was easy to make, and was really tasty. I put Hinata Shoyo getting ready for a perfect spike on it, the Karasuno “Fly High”, and their iconic crows on this cake. Taking the extra time to pipe out the design was honestly not that hard, and made for a really unique and fun cake. Totally happy with how that came out!
Total Time 5 hours
Course Dessert
Cuisine Japanese

Ingredients
  

For the Design/Pattern Batter:

  • 30 g granulated sugar
  • 2 oz unsalted butter softened
  • 40 g all purpose flour gluten free
  • 30 g egg whites
  • Food coloring

For the Vanilla Roll Cake:

  • 3 large eggs separated
  • 1 tbsp neutral flavoured-oil
  • 1 tbsp milk I used soy
  • 55 g granulated sugar
  • 30 g white rice flour
  • 15 g glutinous rice flour
  • 1/2 tsp vanilla paste can be substituted with vanilla extract, but the paste is so good!

For the Chocolate Charcoal Whipped Cream:

  • 1 cup whipping cream I needed an extra tbsp of cream to get the right consistency.
  • 2 tsp cornstarch
  • 3 Tbsp powdered sugar
  • 4 Tbsp cocoa powder
  • 5 tsp activated charcoal powder

Instructions
 

  • For the Design/Pattern Batter:
  • Mix the ingredients (without the food coloring) together until smooth. You can use an electric whisk if you'd like.
  • Divide your batter into smaller bowls. The number depends on how many colors your need, and color each bowl accordingly.
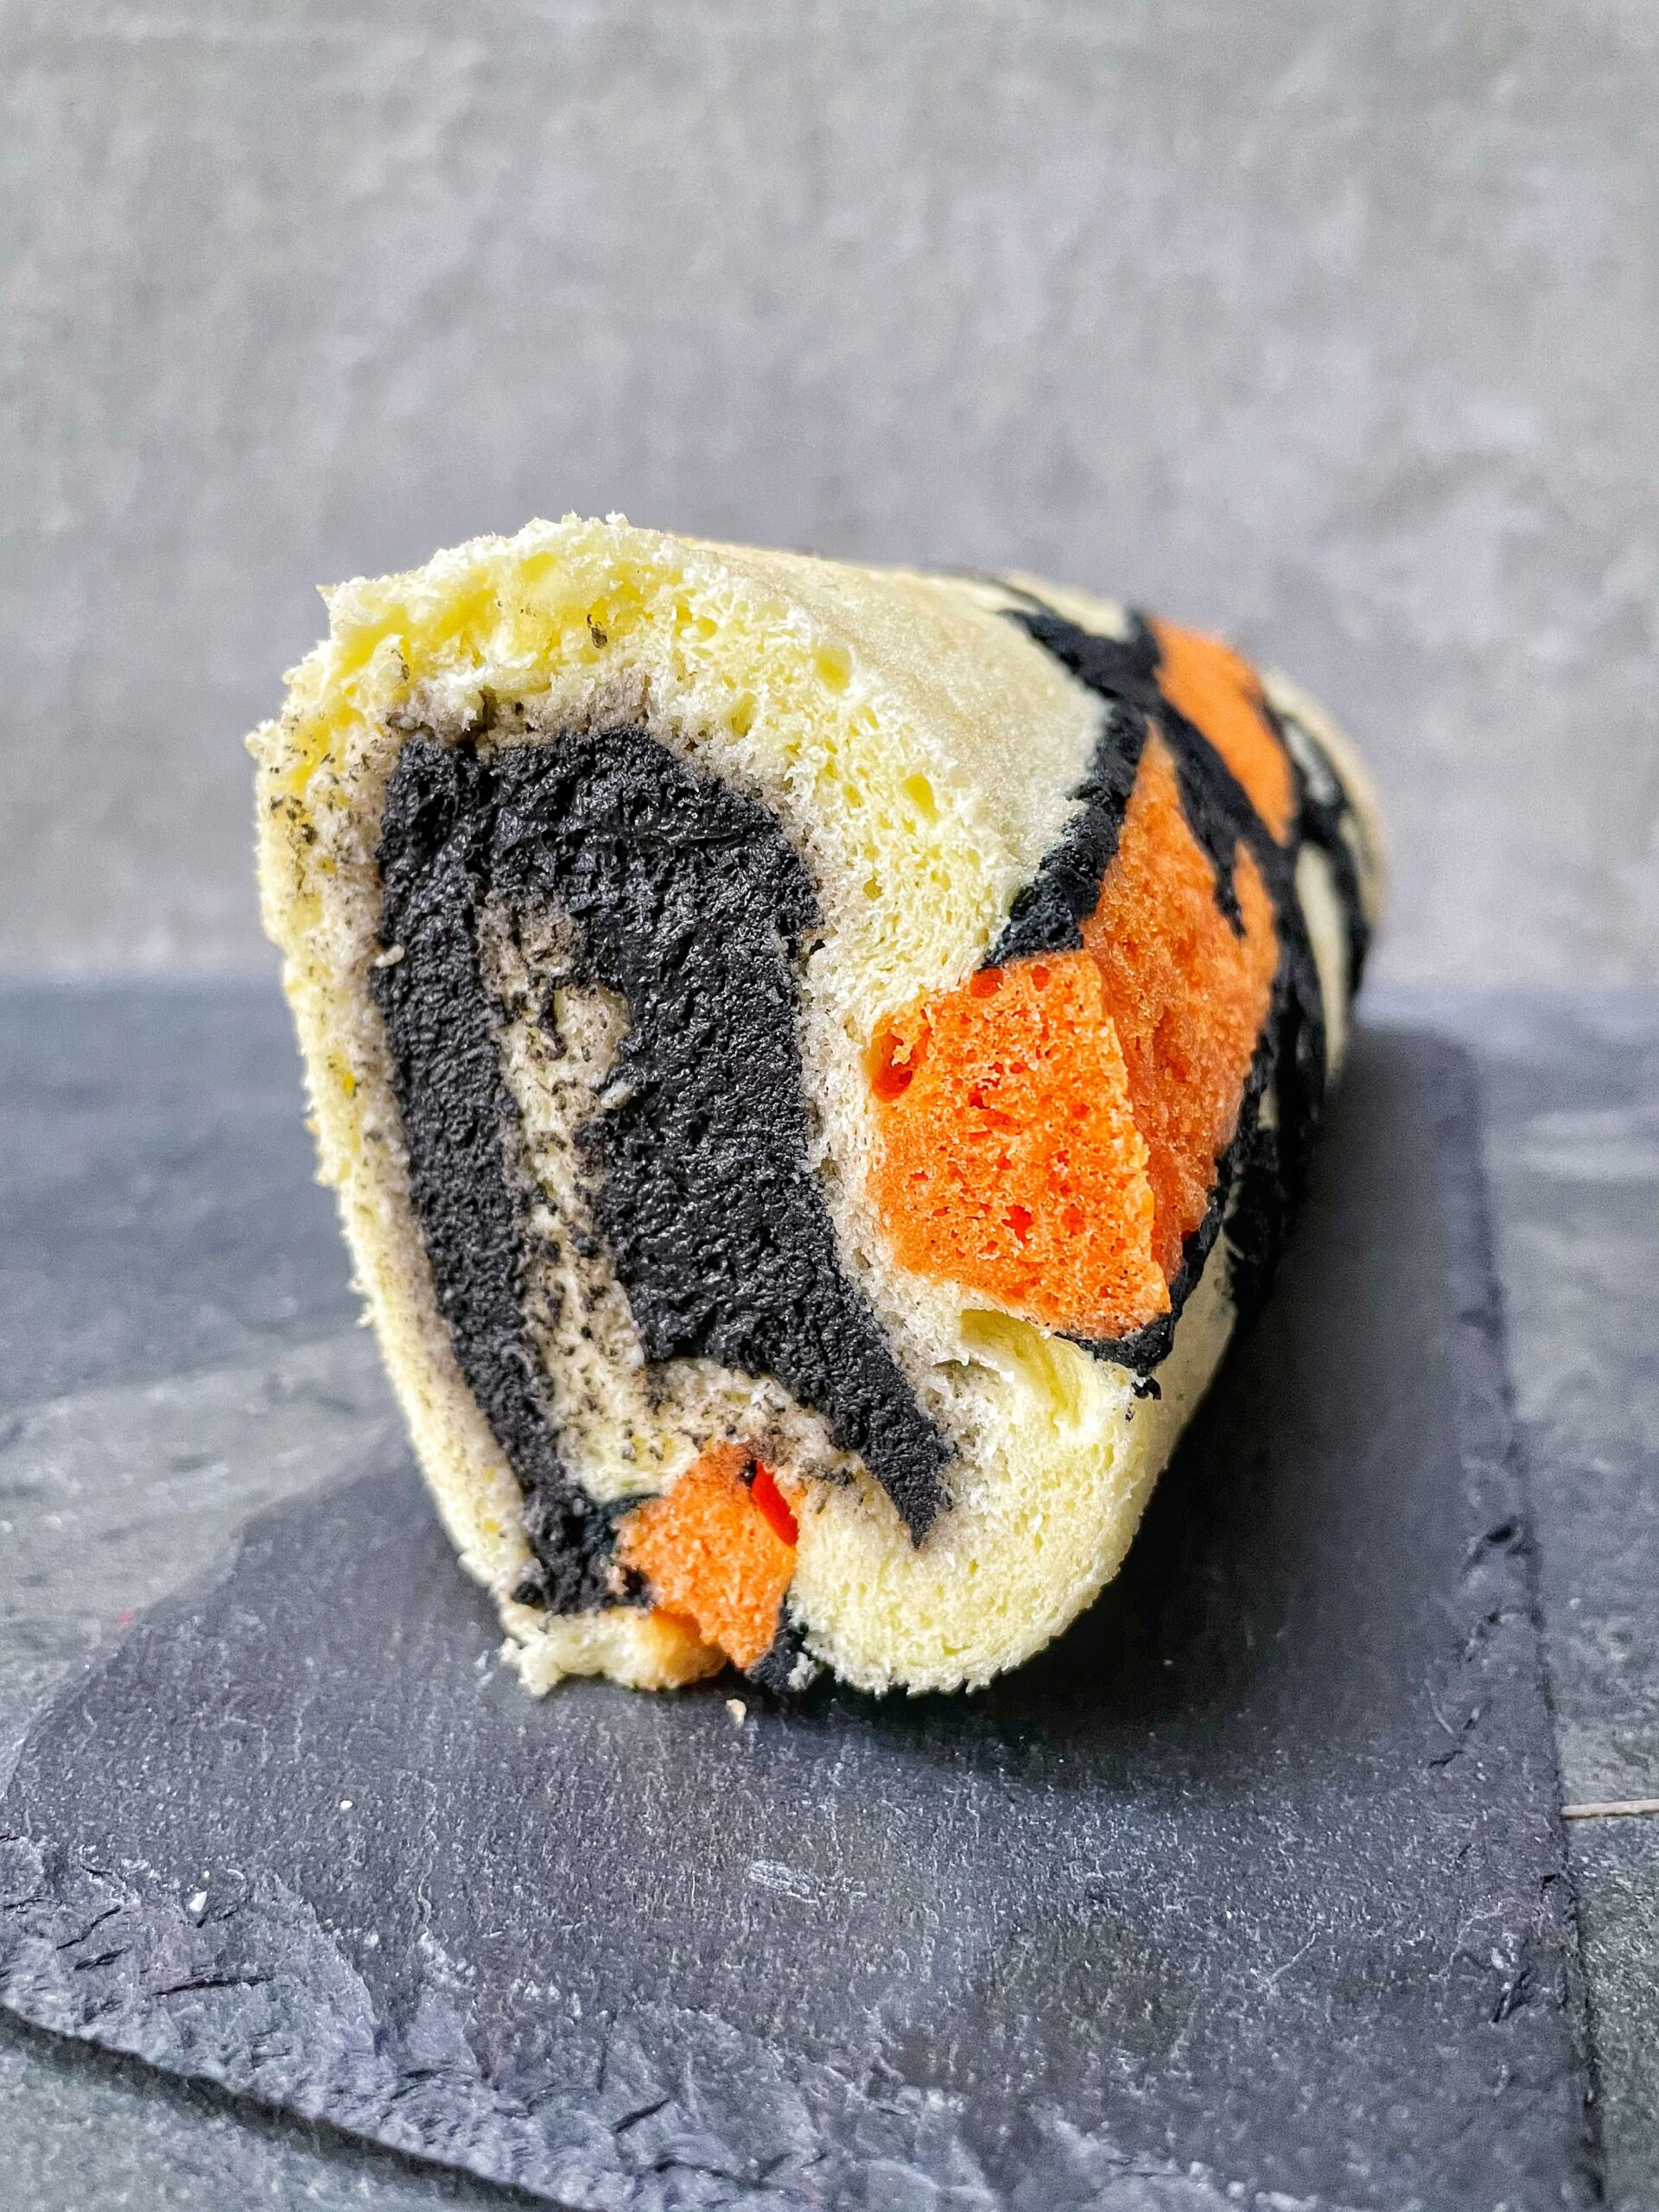
  • I separated the batter into 2 bowls, black and orange for my design.
  • Prepare your design to fit the pan, flip the image horizontally (or else it will be backwards) and print it out. On a tray or a large cutting board (my preferred method), place your print out underneath a piece of parchment paper cut to fit in the pan.
  • Using a small piping tip, pipe your design onto the parchment paper. If you have multiple colors overlapping (like in my Haikyu!! design), you need to freeze each color for about 15 minutes before layering on top. Also, be careful to put your colors down in the right order, front goes first, back goes last.
  • Freeze your design for about 20 minutes before pouring your cake batter on top. This is a good time to make your batter.
  • For the Vanilla Roll Cake:
  • Preheat the oven to 350F (with convection)
  • Separate the egg yolks from the whites.
  • In a medium bowl, whisk together the egg yolks, oil, milk, and vanilla together until smooth and slightly thicker.
  • Using a stand mixer, hand mixer, or a whisk, start making your meringue. Whip the egg whites until foamy. Add your sugar in three stages and keep whipping until you have shiny stiff peaks.
  • Fold your meringue into the yolk mixture ⅓ at a time. Be careful not to lose all the air.
  • Sift the flour into the mixture and fold until smooth.
  • Remove your pattern from the freezer and place into your pan. If it doesn't cover the entirety of your pan, be sure to line it with additional parchment paper.
  • Pour your batter on top of the pattern and smooth it out.
  • Bake for 14 minutes and golden.
  • Remove the cake from the pan to cool completely on a wire rack.
  • For the Chocolate Charcoal Whipped Cream:
  • Begin whipping your cream until you reach soft peaks. Add in the corn starch, sugar, cocoa powder, and charcoal.
  • Continue whipping your cream until you have firm peaks but they are not crumbly.You can add more cream as needed to get the right consistency
  • Instructions to assemble the roll cake:
  • When the cake is cooled, lay it pattern side down on a work surface. Carefully separate the cake from the parchment paper, little bits will peel off but it's ok! Leave it laying on the parchment.
  • Add the whipped cream and spread it evenly across the cake.
  • Being mindful of the direction of your pattern, begin rolling your cake from one end to the other. Use the parchment paper to guide you. Roll up, wrap tightly in parchment and plastic and place in the fridge to set. *** Do not skip this step, if you cut it now, it will fall apart and not stay rolled up!
  • Slice and enjoy! The cake will stay moist and delicious if it is stored tightly wrapped in the fridge for 3-5 days.
Keyword Anime, Baking, Dessert, Easy, Geek With Me, Kawaii

Gluten Free With Me is where food and geek meet! 

With a heavy focus on food inspired by Japan and recreations from your favourite Anime, Manga, Movies, & Games. 

Oh… and It’s all gluten free!

You might also enjoy

Meet Carly or Welcome?

 WRITER & BLOGGER

Meh syh Schlitz, tempor duis single
origin next level ethnic isna smiko me
time mesole learn more…

Subscribe to our Newsletter and stay up to date!

DID YOU MAKE THIS RECIPE?

Please share the pictures with us!
Tag @Glutenfree.Carly #Glutenfreewithme and #geekwithme on Instagram

Leave a Reply

Your email address will not be published. Required fields are marked *

Recipe Rating


Subscribe to our Newsletter and Stay up to date!